


Origami Ryujin 3.5 Tutorial Guide
While the body is a test of endurance, the head is a test of pure spatial reasoning and precision. The head incorporates the corner of the paper and utilizes dense, asymmetrical collapses.
Success with the Ryujin 3.5 begins with selecting the right paper. For a successful fold, experts recommend:
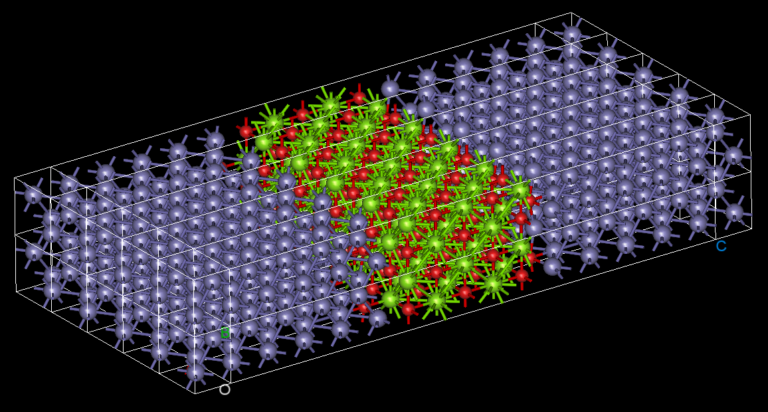
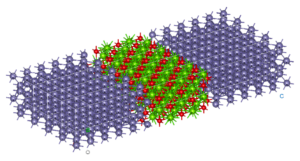
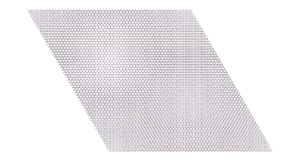
The head is folded from a 45-degree offset graft in the top left. origami ryujin 3.5 tutorial
Focus on the whiskers, horns, and facial features, which require delicate manipulation of the paper layers. 6. Tips for Success from the Origami Community
Do not try to fold the whole model on your first try. Practice the scale-locking unit on a smaller piece of paper first. While the body is a test of endurance,
Use a bone folder for every single crease. The Ryujin 3.5 is extremely dense, and soft creases will lead to a messy model.
The most dramatic moment is the . The folder must manipulate the pre-creased grid so that the flat paper suddenly bunches and transforms into three-dimensional limbs and a serpentine body. This step is "Making the Impossible," as the paper becomes thick and difficult to manage. Phase 5: The Soul in the Details For a successful fold, experts recommend: The head
Minimum recommended size is 100cm x 100cm (approx. 3.3 x 3.3 feet). Elite folders often use 200cm sheets.
The 3.5 version features highly advanced, five-clawed limbs. You will use specialized pleat-intersection techniques to separate the paper layers into distinct fingers. Phase 4: The Final Collapse and Shaping
You need a square sheet measuring at least 100 cm x 100 cm (approx. 39 inches). Expert folders often use 120 cm to 150 cm sheets to keep the scales manageable.
The "Scale Lock." To create the dorsal spines, you must perform a repetitive series of open-sinks on every other row of the grid. There are 96 rows. You will do this 48 times. Do not listen to music; listen to the paper. It will tell you when it is about to tear.